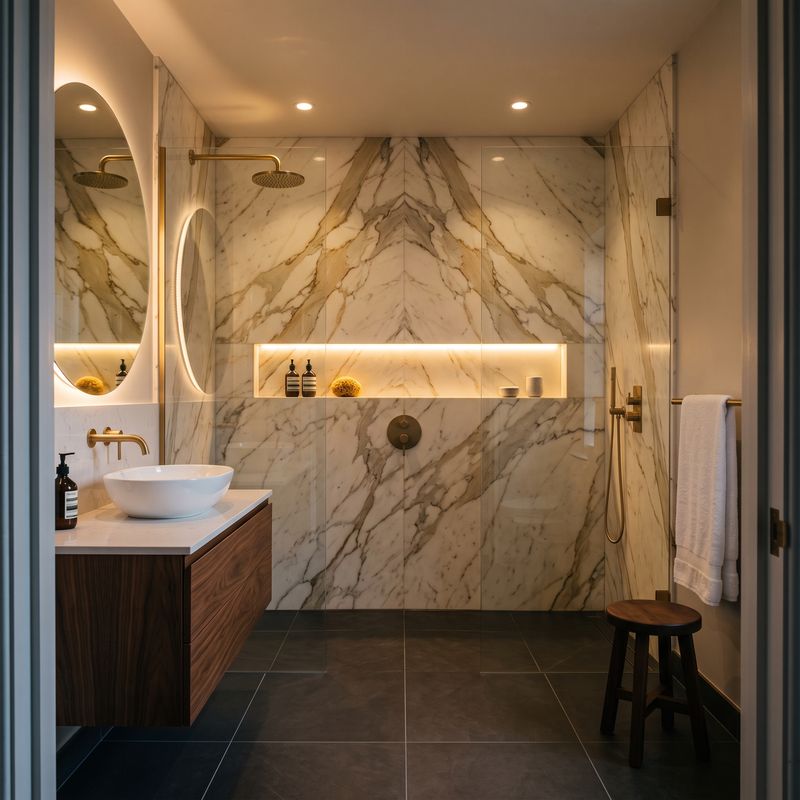

The short answer: a curbless shower has no step or curb, so the floor itself has to keep water in. That means the shower area sits lower than the bathroom floor, slopes toward a drain (often a linear drain), and the waterproofing carries on past the glass into the room. Done right, it’s the most beautiful, easiest-to-clean shower you can own. Done wrong, it’s a flood waiting for a bath mat.
Curbless showers are one of my specialties in Burlington, Oakville and Halton. Here’s everything I’d tell you over coffee before we start.
Why people love curbless showers
- One continuous floor. The bathroom looks bigger and calmer, especially with large-format tile running straight through.
- Nothing to trip over. Great for kids, aging parents, and anyone who wants to stay in their home long term.
- Easier to clean. No curb, no grout lines on a curb top, no corners collecting soap.
The three things that make or break a curbless shower
See inside the shower1. Slope
Water needs a path to the drain. Shower floors are commonly sloped about ¼ inch per foot toward the drain (confirm with the drain maker and code for your project). Too flat and water sits; too steep and it feels like showering on a ramp.
With no curb, the slope also has to start at the right place. The shower zone needs to tip toward the drain before water ever reaches the bathroom side.
2. Getting the floor low enough
To have a flush entry and a sloped floor, the shower area usually has to sit lower than the rest of the bathroom. There are a few ways to get there:
- Recess the subfloor between the joists in the shower zone, where the framing allows it.
- Modify the framing. Only where it’s structurally appropriate, sometimes with a structural designer’s input and a permit.
- Build up the rest of the bathroom floor so the shower can stay where it is.
- On concrete (basements): cut and lower the slab in the shower area, or plan the build-up carefully.
Which one you need depends entirely on your house. That’s why I look at the framing, joist direction and what’s below before anyone picks a drain. If structural changes are involved, check whether you need a permit with the City of Burlington (our permit guide).
3. Waterproofing beyond the glass
Water will travel past the shower entry sometimes. A splash, a kid, a handheld pointed the wrong way. A smart curbless design extends the waterproofing out onto the bathroom floor, not just inside the glass.
In my curbless showers, the floor is always a custom-sloped cement mortar bed, never a foam pre-slope or foam tray, with a Laticrete Hydro Ban membrane over it and no traditional liner pan. The drain comes from Shower Grate Shop: a drain compatible with Hydro Ban, per Laticrete and the drain maker’s instructions. The membrane gets reinforcing fabric at every change of plane and seam and carries past the shower zone, per Laticrete’s current installation instructions. Once the Hydro Ban has cured per Laticrete, the shower gets an overnight flood test before a single tile goes down. No curb? There’s still a way: a temporary dam at the entry. (How a flood test works)
Why cement, not foam? Foam pre-slopes and trays are real, tested products, and they work when installed to their maker’s instructions. I just don’t use them. I slope every shower floor by hand in cement, to the exact room, drain and tile, and with Laticrete 3701, wire mesh in the bed and rebar in the curb, it’s honestly crazy over-built. That’s my preference, not a knock on anyone else’s system.
Linear drain or centre drain?
See inside the shower| Linear drain | Centre (point) drain | |
|---|---|---|
| Slope | One direction, like a ramp | From all sides, like a funnel |
| Best tile | Large-format tile and slabs | Smaller tile or mosaics, or envelope cuts |
| Look | Clean, minimal, continuous | Classic |
| Placement | At the back wall or across the entry | Usually centred in the shower |
Linear drains are the usual pick for curbless because the single slope lets big tile follow the floor without lumps. Putting it across the entry catches water right where it might escape. Putting it at the back wall keeps it out of sight.
Centre drains can work in a curbless shower too, but the four-way slope means smaller tile or careful cutting.
The rule: the drain, the slope plan and the tile size get designed together, before demolition, not figured out on the day.
Picking tile for a curbless floor
- Large-format porcelain with a linear drain gives that seamless, spa look. It needs a very flat, accurately sloped mortar bed and a setter who knows large tile. (What is large-format tile?)
- Matte or textured finishes on the shower floor. Polished tile on a wet floor is a no.
- Running one tile through the whole room is the signature curbless look. Check that it’s rated for wet floors.
More on choices in How to Choose Tile for a Shower.
Fred K. had me build a large-format curbless shower in his basement, with heated floors running through. Basements are their own puzzle because you’re working with concrete, not joists. His Google review summed up what matters: “Mike used the latest Laticrete products which are gold standard. Built like a swimming pool, waterproofed and no leaks.” That’s the bar. A curbless shower should feel effortless to stand in because all the effort went in underneath.
Glass for a curbless shower
Most curbless showers use a fixed glass panel or a hinged door that swings out. With no curb, the glass sits right on the tile, so the floor needs to be flat where the glass lands. A sweep or a small drip rail can help in tight layouts. Glass is measured after tile, so leave time for it in your schedule. (How long a reno takes)
Curbless red flags
- No plan for where water goes if it gets past the shower zone.
- No one has looked at the framing or what’s under the floor.
- Large tile planned for a centre-drain floor with no cutting plan.
- “We don’t flood test curbless showers.”
The Curbless & Steam Showers Done Right page in our Tile NO’s series has more of these.
Questions to ask your installer
- How will you get the shower floor low enough in my house?
- Which drain do you recommend, and why, for my tile?
- How far past the shower will the waterproofing go?
- How will you flood test it without a curb, and for how long?
- Is the shower floor a sloped mortar bed or a foam pre-slope?
Frequently asked questions
Can any bathroom have a curbless shower?
Most can, but not always easily. It depends on the joists, the floor structure, what’s below, and whether the rest of the floor can be raised. A site visit tells you which method fits your house.
Do curbless showers leak more than regular showers?
Not when they’re designed and built properly. The slope, the drain placement and waterproofing that extends past the shower zone handle the water a curb would normally hold back.
Is a linear drain necessary for a curbless shower?
No, but it’s the most common choice because it allows a single slope and large tile. A centre drain can work with smaller tile or careful cuts.
Can I put a curbless shower in my basement?
Often, yes. On a concrete slab, the shower area usually has to be lowered or the surrounding floor built up, and the drain location matters a lot. It’s very doable with the right plan.
Do curbless showers work for aging in place?
They’re one of the best features for it. Add blocking in the walls for future grab bars, a bench, and a handheld shower while the walls are open.
Planning a curbless shower as part of a bathroom remodel in Burlington? See how we work.
Talk to Mike
Thinking about a curbless shower in Burlington, Oakville or Halton? I’ll look at your framing and tell you honestly what it’ll take. Call Mike at 289-337-1578 or book a consult. See our finished work on Curbless Shower Installation, or try the look on your own bathroom with the free Bathroom Reno Visualizer. Every job comes with a 25-year warranty on tile-setting workmanship.
Sources
- American Concrete Institute FAQ, air voids vs strength (~5% per 1%): concrete.org/frequentlyaskedquestions.aspx?faqid=657
- Laticrete 3701 data sheet (DS-100-1026), mixing: 2 to 3.2 quarts water per 60 lb bag for floor beds: cdnmdm.laticrete.com/Datasheet/NA/20/Datasheet_NA_en_20.pdf
- Laticrete Hydro Ban installation instructions (current version Mike uses)
- Shower Grate Shop (Shower Grate Shop Inc.), drain maker’s information and installation guidance: showergrateshop.com/ · FAQ: showergrateshop.com/support/faqs/ · Linear Drain Handbook: showergrateshop.com/linear-drain-handbook/
- Laticrete Hydro Ban installation instructions (DS 663.5): fabric only required over gaps larger than 1/8″, 72-hour cure for wet mortar beds before Hydro Ban, cure before flood testing, movement joints per TCNA EJ171 with backer rod and LATASIL: cdnmdm.laticrete.com/ProductAssets/Product%20Documents/ds663
- Laticrete Hydro Ban product data sheet (DS 663): cdnmdm.laticrete.com/Datasheet/NA/40/Datasheet_NA_en_40.pdf
- Laticrete 3701 Fortified Mortar Bed data sheet (DS-100-1026): 28-day compressive strength 5,000 to 6,000 psi (34.5 to 41.4 MPa), ASTM C270: cdnmdm.laticrete.com/Datasheet/NA/20/Datasheet_NA_en_20.pdf · product page: laticrete.com/products/3701-fortified-mortar-bed
- Laticrete TDS 196, Proper Trowel Selection and Back Buttering (key in, comb in one direction, back-butter, 95% coverage in showers per ANSI A108.5): cdn-global.laticrete.com/-/media/project/laticrete-internati
- City of Burlington permit page (verified Oct 17, 2026)